This is a follow up post to Part I of How to make and host a Discord Bot where I go through the steps to make a simple bot using the discord.py library. In this post, I will conclude the tutorial by explaining how we can host the bot we made in part I.
Hosting the Bot
We will host the bot on Amazon AWS. Amazon offers a basic plan on EC2 (Elastic Compute Cloud) free for a year! Read more about it here.
First go ahead and create an amazon account in case you don’t have one.
Setting up an Instance
An (EC2) instance is a virtual server. You will get to choose which OS this server will run.
Now once you log in to Amazon AWS, under Services, find EC2. Then under the Create Instance section, click on Launch Instance. This will take you to the Amazon Machine Image (AMI) selection page.
You will see a list of OSes to choose from. For our purposes of hosting a bot, any one of them will do, but the tutorial will be using Amazon Linux AMI 2017.03.1.
Once you select an AMI, you will be asked ot pick the instance type. Assuming you are on the Free service, only one type of instance is available. At the time of writing, only t2.micro is Free tier eligible.
Before you click on Review and Lunch, go to the 6th section Configure Security Group and under the Source section pick My IP.

Now go ahead and click Launch.
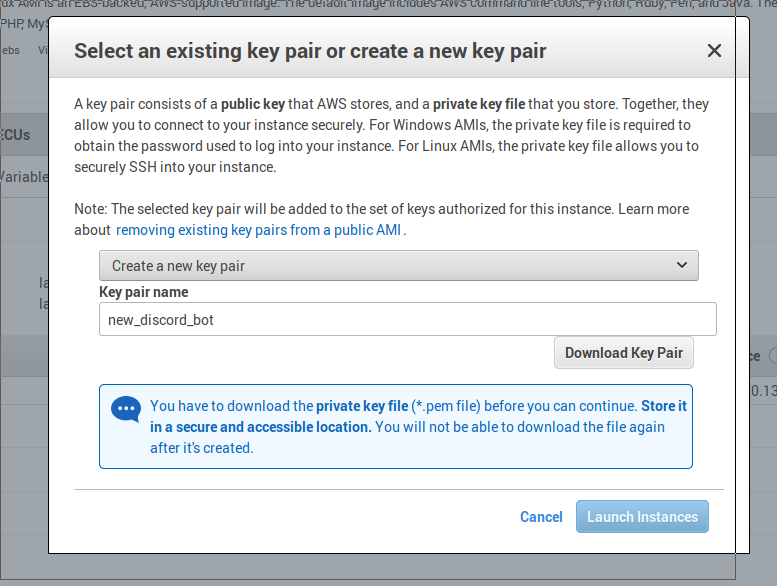
Create A Key Pair
Before launching an instance, you will be asked to select a key pair for the new instance you just created. This key will let us SSH into our instance.
If you don’t have one, select the Create a new key pair option and give it a name before you download the key.
Connect to Your Instance
Find the instances section in the AWS panel. Click on the instance you just created and following the screen instructions connect to your instance.
Setting up Discord.py
Now we need to setup discord.py on your virtual server (i.e., the instance). First we need to check the version of python. The Amazon Linux AMI on my instance came shipped with Python 2.7. So, I need to install Python 3.4.2 or above.
To install Python 3.5 and set up pip3 type each line in the console:
sudo yum install python35
wget https://bootstrap.pypa.io/get-pip.py
sudo python3 get-pip.py
Now we can install discord.py v1.0.0 (rewrite version):
sudo python3 -m pip install -U https://github.com/Rapptz/discord.py/archive/rewrite.zip\#egg\=discord.py
We need to install the requests library (to retrive the list of names for new nicknames):
sudo python3 -m pip install -U requests
Transferring the Code
To transfer files from your local machine to the instance, one way is to use Secure Copy scp.
Running the Code
Once you have transferred bot.py to the instance, we will have to run it in the background. That way, even after you close the ssh session, the code will keep running. This can be achieved using nohup. (nohup can also be setup to print the console log, more in the linked documentation)
Simply excute the following command in the directory where bot.py is stored:
nohup python3 bot.py &
Now, you can close your ssh session! Your bot should be running 24//7.