So, you want to make a discord bot.
In this two part tutorial, I will show you how to make a simple discord bot before exlaining how you can host it on Amazon AWS.
The bot will be written in python using the discord.py library. There are several versions of this library, enough to cause confusion. But for this tutorial, the rewrite (v1.0.0)version, the actively supported branch is used. The documentation is available here. Finally, it is assumed that the reader is familiar with Python 3.
Along the way, I will point out the major changes in v1.0.0. Feel free to skip the quoted sections.
Setting Up
Discord Apps
First we need to create a discord app. To do this, first go to https://discordapp.com/developers/applications/me and click on the New App box.
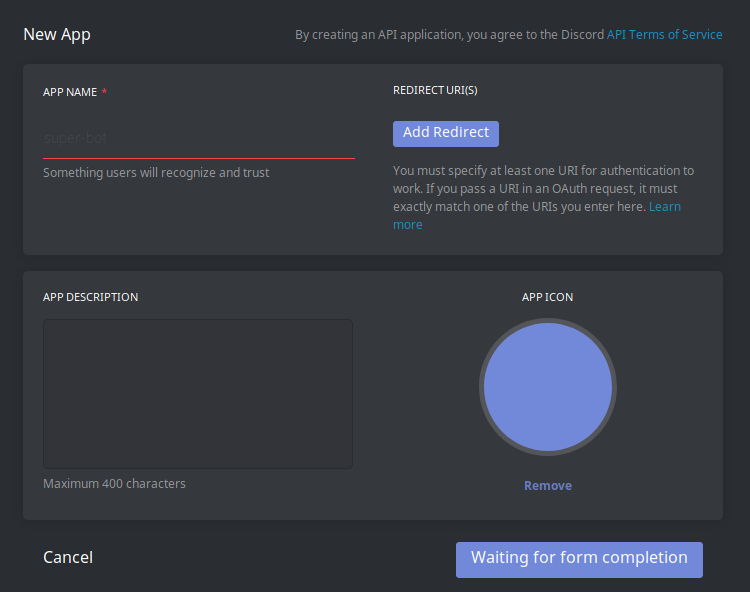
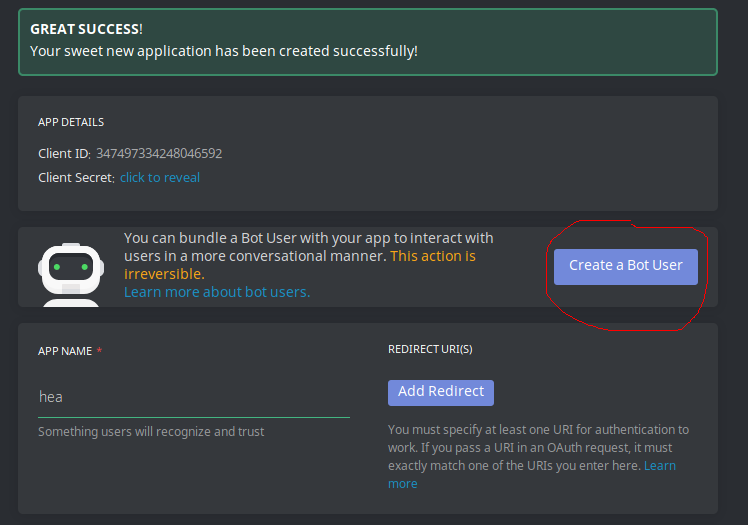
After giving it a name, finish the form. Next, click on Create a Bot User.
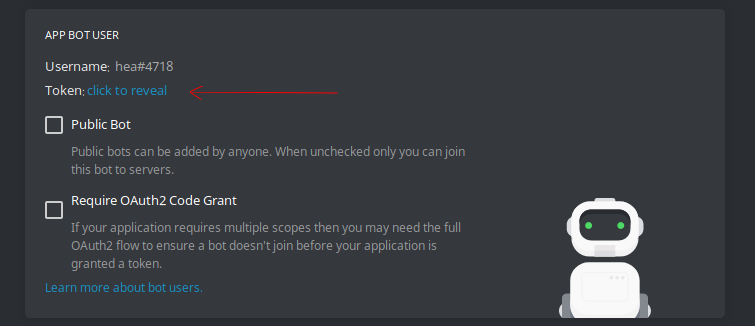
Finally, save the token. In the bot code, there will be a place where we will need this token. The token is how discord identifies the code as one for your bot.
For now, we will stop here with the discord side of things. We will pick it up later when we will have to invite the bot to your server.
Discord.Py
The discord.py on pip is not actively maintained. It is v0.16.8. So to install the rewrite version, follow these steps:
If you just made the switch to v1.0.0a make sure to check the changelog. Big changes have been implemented.
First of all, make sure you have Python 3.4.2 or above.
Then run the following command:
python3 -m pip install -U https://github.com/Rapptz/discord.py/archive/rewrite.zip
To check the version run the following in the python console:
import discord
discord.__version__
You should get 1.0.0a (as of Aug 15).
Writing the bot
Okay we are going to make a fun bot that will change the nickname of a user to a random word every 10 seconds for 15 minutes.
First we import the necessary libraries from discord.py:
import discord
from discord.ext import commands
If you get a ModuleNotFoundEror or an ImportError, check your discord.py installation.
For this particular bot, we will also need to import and/or install the following libraries:
import random
import requests
import asyncio
Basic Stuff
Some things you will put in every bot code.
command_prefix='$'
description = 'Enter a description here'
bot = commands.Bot(command_prefix, description)
The command prefix specifies how you want to signify the start of a command. In this case everytime a user types $some_command the bot picks it up as a command.
Next, we initiate the bot. commands.Bot() represents a discord bot.
Traditionally, one creates an instance of Client but with the discord extensions (discord.ext) library, the commands.Bot instance does everything the Client one does. The Commands extension is more preferable as it makes it very easy to write bot commands. We discuss commands in the sections below.
Another basic thing is that the bot prints basic info about itself when it goes online in a guild.
@bot.event
async def on_ready():
    print('Logged in as')
    print(bot.user.name)
    print(bot.user.id)
    print('------')
The @bot.event decorator is an event listener inherited from the Client instance. In this case, it checks if on_ready is called. And on_ready is called after bot login to the guild (server) is successful.
Put this line at the end of the code and in the single quotes put the token you saved earlier.
bot.run(' ')
The Bot
Now we get to the meat of the bot code. As I have said, the bot will change the nickname of a user to a random one. So let’s run down through the steps.
The List of Names
Step zero is to prepare a list of random names. I got a dictionary list of words from SVNWeb:
word_site = "http://svnweb.freebsd.org/csrg/share/dict/words?view=co&content-type=text/plain"
response = requests.get(word_site)
The Command
First let’s give the command a name. Let’s call it rnick for random nick. To start a bot command, we invoke the @bot.command() decorator.
In the older versions of discord.py, it was necessary to state
@bot.command(pass_context=True)in order to use context, but it’s no longer necessary as context is passed by default since v1.0.0
After declaring the @bot.command() decorator, we define a function inside the command:
@bot.command()
async def rnick(ctx):
    return
Next, the user would want to specify the other user they want to change the nickname of. So we want the command to be called this way:
$rnick someUser#2330
Now, if you have noticed, the id type someUser#2330 is one of the ways discord internally identifies a user. This is the same as writing a mention $rnick @someUser. Anyway, to pass this argument to the command, we will use Converters.
Converters
Converters take strings of arguments like someUser#2330 and convert them into a target type. A target type can be, in the simplest cases, an integer or a float. A simple example of a code (from the doc) that uses an integer converter is:
@bot.command()
async def add(ctx, a: int, b:int):
    await ctx.send(a + b)
This command takes two strings converts them to integers, then sends their sum to the channel where the command was called. The ctx specifies the context (literally the context like channel, user, etc. where the command was invoked).
The context carries a lot of information including the name of the channel, the user who invoked the command, etc. It is a very important concept in writing discord.py commands. Check out the documentation for more.
In our case, we want the target type to be discord.Member, that is, a class that represents a discord member. To do this we rewrite the function declaration to:
async def rnick(ctx, member : discord.Member):
The nice thing about discord converters is that we don’t need to formally specify the targeted user. By formally, I mean it is enough to give the command the user’s nick or part of his ID. When the command is executed, the function tries to convert the given string of argument into the target type, and checks if the string is a mention, an ID, a nickname, etc. under the hood and it finally passes the converted argument as a parameter to the function.
Other discord converters are available to to pass an argument as a User, TextChannel, VoiceChannel, Role, Invite, Game, Emoji, and Colour. See the doc for more.
The Function
Since we want the nickname to change every 10 seconds, for 15 minutes, we want the function that changes the nick to run 90 times every 10 seconds. So the bot command will be:
@bot.command()
async def rnick(ctx, member : discord.Member):
    counter, runs = 0, 90
    while True:
        new_nick = random.choice(response.content.splitlines()).decode("utf-8")
        await member.edit(nick = new_nick)
        counter += 1
        if (counter) >= runs:
            break
        await asyncio.sleep(10)
Recall that member is a type of discord.Member, and besides requesting info about the user, you can also run a couroutine (i.e., another function you could asynchronously run with the bot command) like edit(*, **fields) where you pass on parameters such as nick, mute, deafen (the last two being boolean).
Other coroutines on
discord.Memberincludeban(*kwargs),unban(*),move_to(*channel, *),add_roles(*roles), etc.
The last line of the code above tells the function to sleep for 10 seconds, so to speak. You can read more about the asyncio library here.
As it stands, our code is now ready to be executed to run the bot. To put it all together,
import discord
from discord.ext import commands
import random
import asyncio

command_prefix='$'
bot = commands.Bot(command_prefix)

word_site = "http://svnweb.freebsd.org/csrg/share/dict/words?view=co&content-type=text/plain"
response = requests.get(word_site)

@bot.command(pass_context=True)
async def rnick(ctx, member : discord.Member):
    counter, runs = 0, 90
    while True:
        new_nick = random.choice(response.content.splitlines()).decode("utf-8")
        await member.edit(nick = new_nick)
        counter += 1
        if (counter) >= runs:
            break
        await asyncio.sleep(10)

@bot.event
async def on_ready():
    print('Logged in as')
    print(bot.user.name)
    print(bot.user.id)
    print('------')

bot.run('') #Your Token Here
Extra Features
One thing we can add is a verbose feature. That is, the bot prints out something like: Sam(userna) is now cat, where userna is Sam’s discord username (so that the next time the nick changes we still know who is who.)
To add the option of having the bot be verbose, we will introduce another parameter. Let’s call this parameter silent and convert it to integer initialized to 1; so when it’s missing from the command call, the function doesn’t raise an exception. So the bot command looks like:
@bot.command(pass_context=True)
async def rnick(ctx, member : discord.Member, silent : int = 1):
    counter, runs = 0, 90
    old_nick = member.display_name
    while True:
        new_nick = random.choice(response.content.splitlines()).decode("utf-8")
        if silent == 0:
            await ctx.send(str(old_nick) + " (" + str(member.name) + ") "+ " is now " + new_nick)
        await member.edit(nick = new_nick)
        counter += 1
        if (counter) >= runs:
            break
        await asyncio.sleep(10)
Now all one has to do to get a verbose change of nicknames is:
$rnick Sam 0
We can also add permission checks, responses to errors, and many more features, but for this tutorial we will leave it there.
Running the Bot
Finally, save the code as anything but discord.py. Say bot.py. But before running it, the bot must be invited to your server.
To have the bot running, you need to create an invite URL. This can easily be done using this handy invite generator. You will need to copy the Client ID of your bot. Go to the Bot’s application page (see second image above).
For this bot, we need to have Text Permissions, so check the Manage Messages and Select Non-Administrative boxes. Finally, generate the invite and follow the link the page provides you.
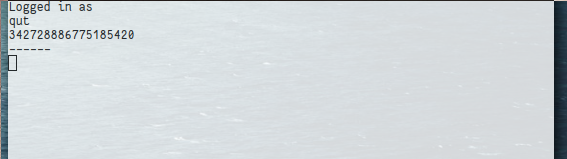
Once invited, run bot.py from the python console. If successfully running in the guild, the bot will print something like this in the console:
Hosting the Bot
As you probably have figured already, the bot will not be available for users when you stop running bot.py. In other words, the if you want a bot that runs 24/7, the console running the code (and hence your machine) must be online 24/7.
But worry not, there are affordable (including free) options to keep your bot online for however long you want (modulo technical difficulties). The most popular platforms are Heruko, Amazon AWS, and Google Instance. Oh and if you have a spare machine, you can run it there for free! (Electric bills!)
I thought of trying out Amazon AWS and so far I am satisfied, granted my bot only serves one other guild, so hardly any traffic or load. Anyway, let’s go through how you can host your bot on Amazon AWS in the next part of this tutorial.